Objective: To design, perform prepress functions, perform make-ready, and production of a 3 color functional label design
Purpose: To identify areas of concern or difficulty in design based on production equipment available, art limitations, and reflection of production of designed artwork
Materials:
- Mactac Substrate
- Dieline: 2.5″ x 5.875″ Rectangle
- Performa Inks: Blue, Black, Brown, Red
- Flexo Parts
- Ink tray- holds your ink
- Rubber Roll (Ink Metering or Fountain Roll): Picks up ink and transfers to anilox roll.
- Doctor blade- removed excess ink by scraping anilox roll
- Anilox roll/cylinder- the heart of flexo, controls amount of ink transferred to the plate cylinder
- Plate cylinder-
- Holds flexible plate. Gray is the plate
- Sticky back (yellow)=holds on flexible plate itself
- Holds flexible plate. Gray is the plate
- Substrate
- Supports impression cylinder
- Impression cylinder-provides sturdy base

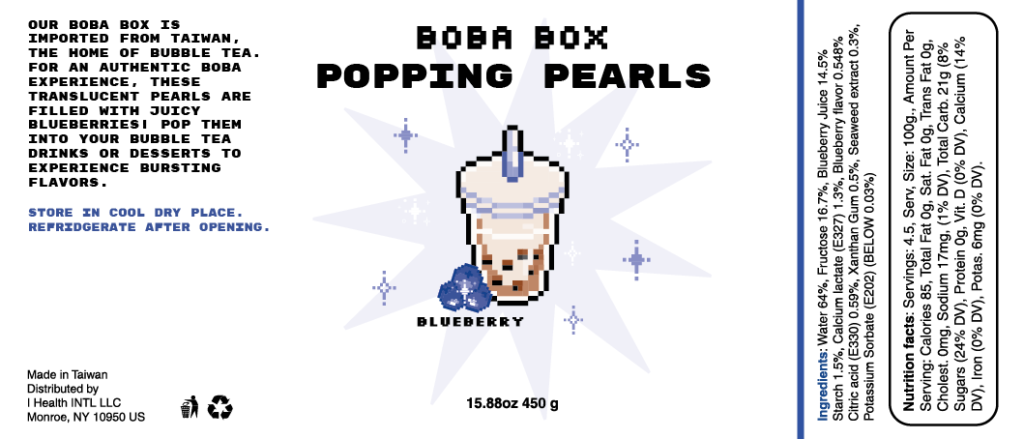
For my 3 Color Process, I designed a pint container label for Boba Popping Pearls to align with my product.
For the Comco, my group needed to set up a station for each color. The tools and equipment were all in a designated drawer, and the anilox roll was placed in order from Black, Blue, Red and Brown. Below are the steps on how to to assemble the Comco.
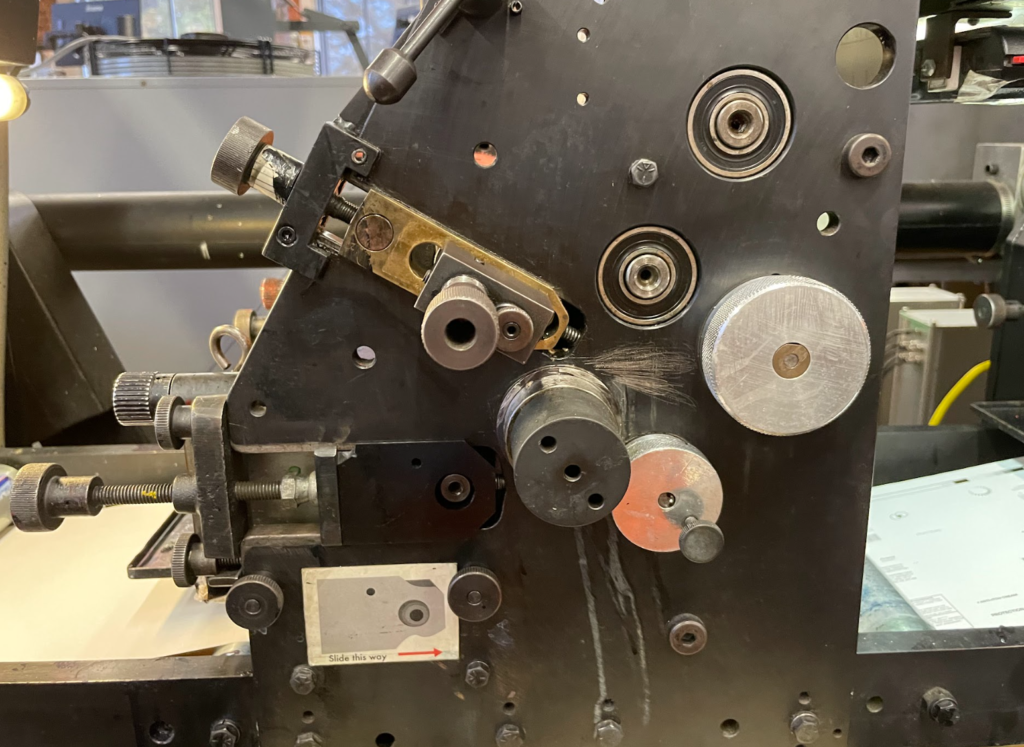
Assembling a Comco Station:
- Put an ink metering roll on the press by placing the gear side of the roll to the gear side of the press.
- Next attach the non gear side of the ink metering roll.
- (Bull nose goes in first, cape flies behind it)
- Wear special safety gears for protection especially when inserting doctor blade
- Handle the Doctor Blade with care by holding it facing towards you.
- Make sure you see two threads in the square
- Doctor blade is very sharp! Be careful!
- Place the doctor blade by rocking it over.
- Secure the doctor blade in place by rolling the S clamp all the way down.
- Hook it on both the left and right side. Don’t tighten it, make it a little loose.
- Make sure every piece put in is parallel
- Move the ink metering forward about an 8th of an inch away from the anilox roll
- Install ink tray to hold ink and put under ink metering roll and secure it by placing ink tray rods all the way across
- Ink try plug goes on ink tray, can nest wipes into plug to be extra safe
Ink Metering on a Comco Station
- Swirl your ink. Avoid forming bubbles by shaking ink. Bubbles will interfere with viscosity readings.
- Check the ink plug, see if anilox roll is moving.
- Pour carefully and hold it so it doesn’t touch the doctor blade.
- Make sure it’s at the button of the ink metering roll. ¾ of an inch of the ink showing on the side.
- Meter by moving ink metering roll to meter.
- Observe if the ink metering roll is parallel to the anilox roll.
- Doctor blade knobs will turn counterclockwise to adjust if it’s not parallel to the anilox roll.
- Turn on the auto manual and turn off the press you are placing your hands on moving rolls. Do this step when putting on a plate.
- Place the plate rode in the 3rd hole, and secure the knob.
- Keep everything parallel and place the plate clamps onto the plate.
- After turn the press on back on quickly because it will affect the volume and the angle will dry the anilox roll
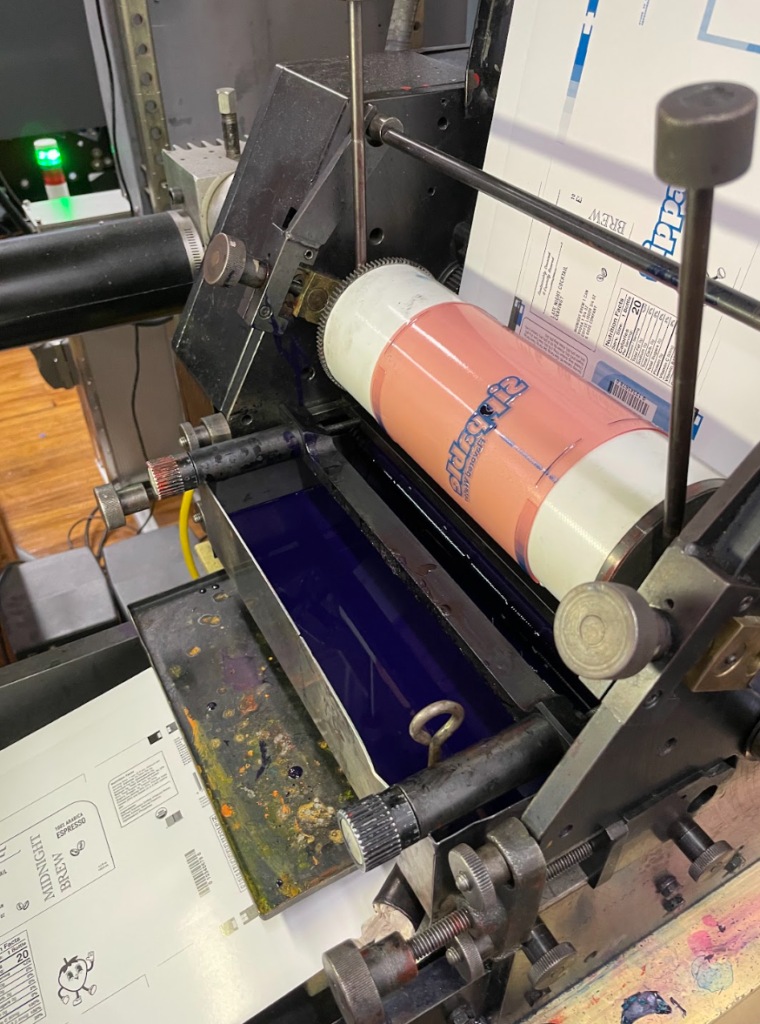
After the Comco is set up, it is time for production!
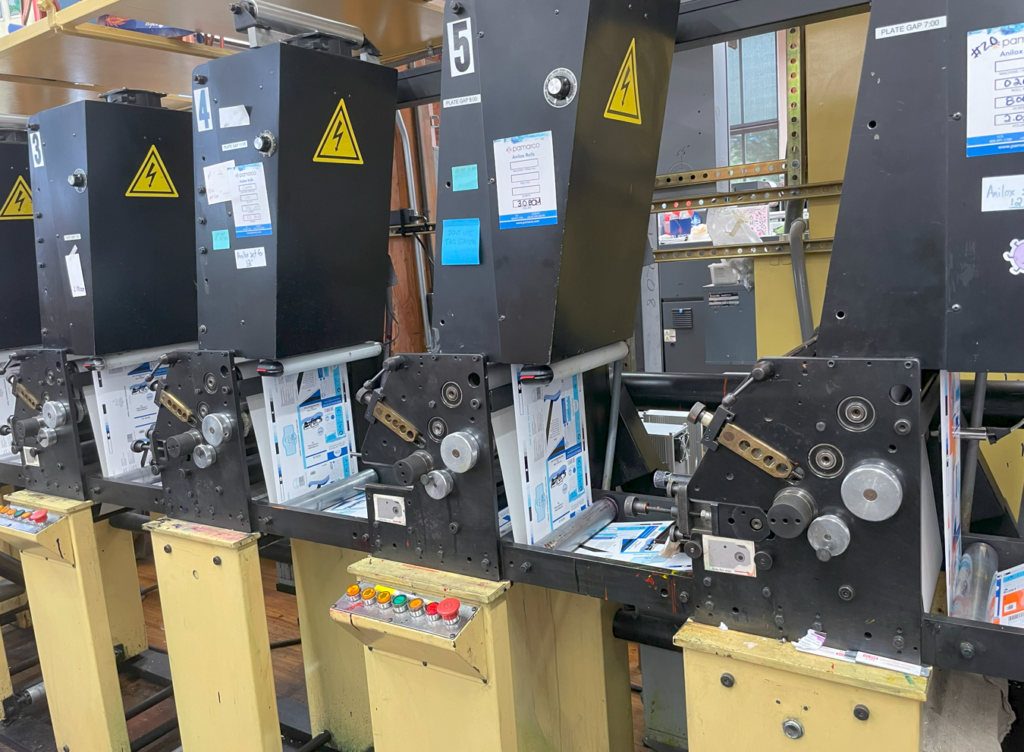
Once the operator says clear, we all have to make sure we are all clear and say it back. When the press is operating, we need to set the impression by moving the knobs clockwise. We have to carefully turn the knobs because you do not want to over impress. After, you will gently impress the plate to the substrate. We need to transfer the ink to the plate by adjusting the knobs. The anilox roll’s sole purpose to deliver a uniform layer of ink to the surface of the plate and it’s what impacts ink film thickness. It houses and holds many cells and each cell has a certain depth of opening ratio measured in BCM.
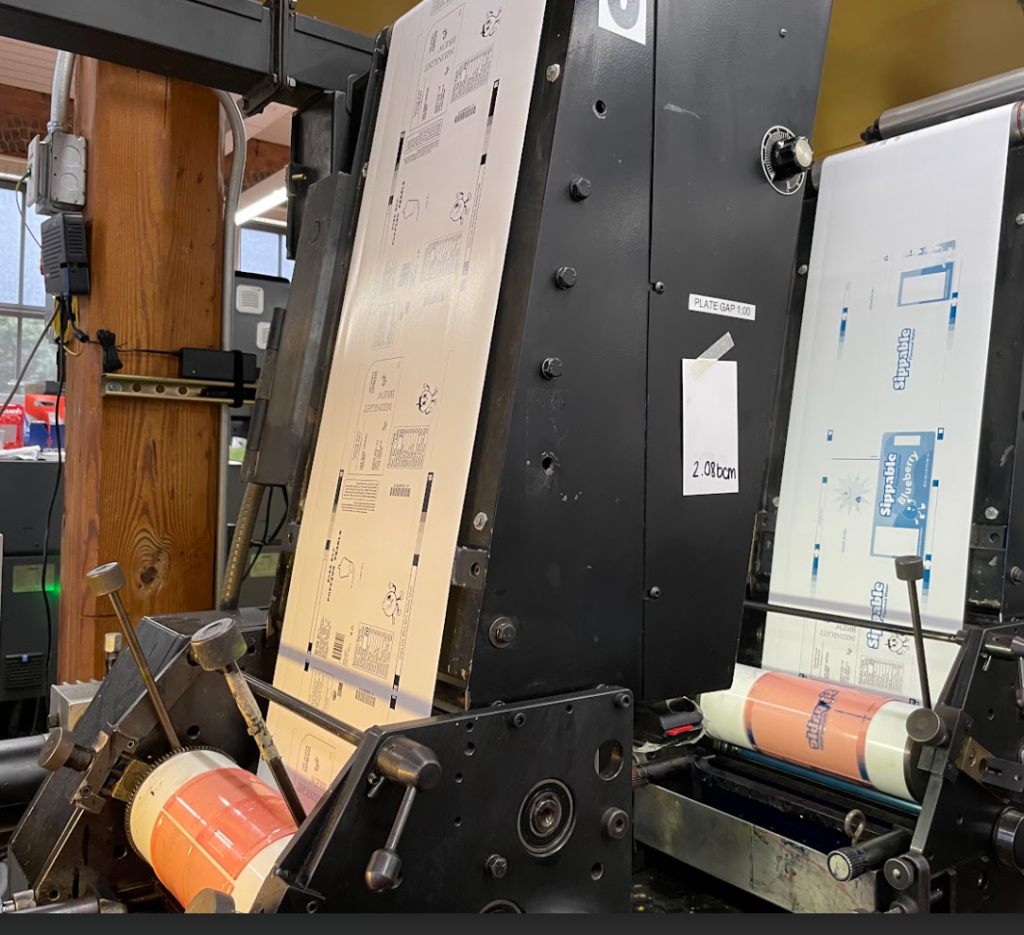
Now it is time for registration, with the spot colors, we didn’t have to worry much about layering the colors over the other unless someone didn’t preview the separations of the colors and incorrectly used the wrong one. My group each handled a station and I handled brown. Mine was very easy to adjust, I had to move it down a hair.
Once everything was completely registered, we printed more repeats to get a good number of labels.
Once we finished everything, we only had to clean one color which was quick, but it’s still important to thoroughly clean the equipment so that the inks won’t mix with the other inks since it will be used my others.
First we unplugged the ink tray and slowly scrapped the excess ink into a funnel that connects to the ink bottle. After, we squirt water onto the anilox roll and take a rag to soak up the excess ink. Flexo has water-based ink options which are a lot more environmentally friendly, not like newspapers where ink rubs off your finger.
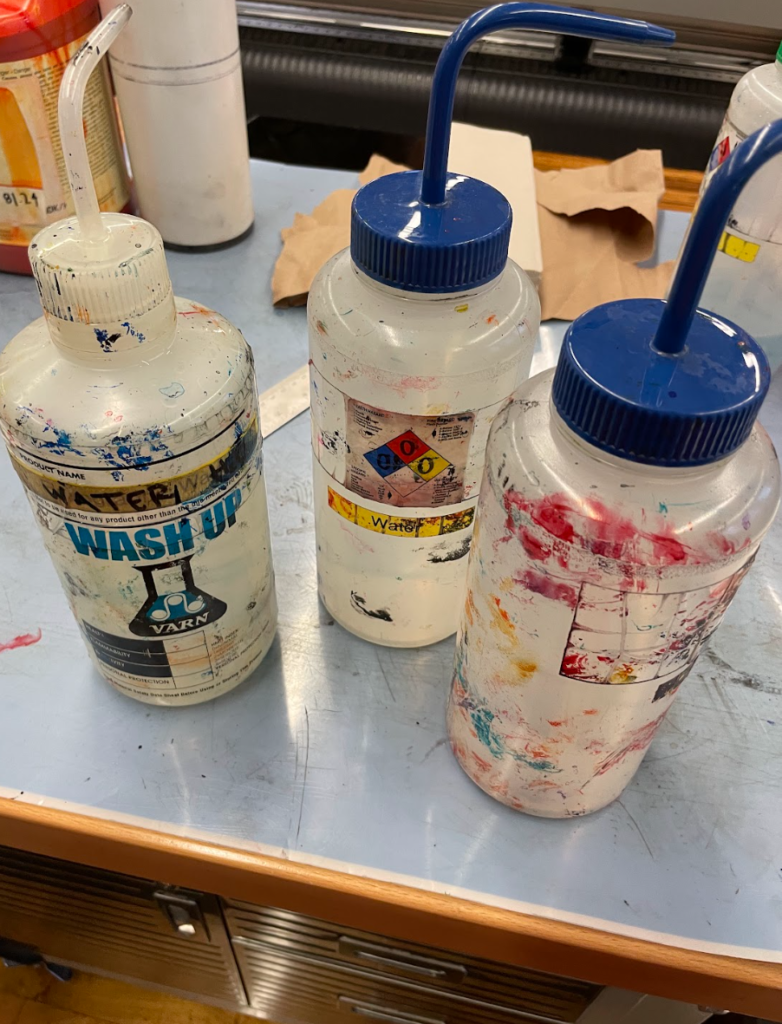
After the excess ink has fallen out the anilox roll, we took about the ink tray and cleaned the excess ink off in the sink. Last we put the ink tainted parts in the designated station.
Below is the final printed repeat!
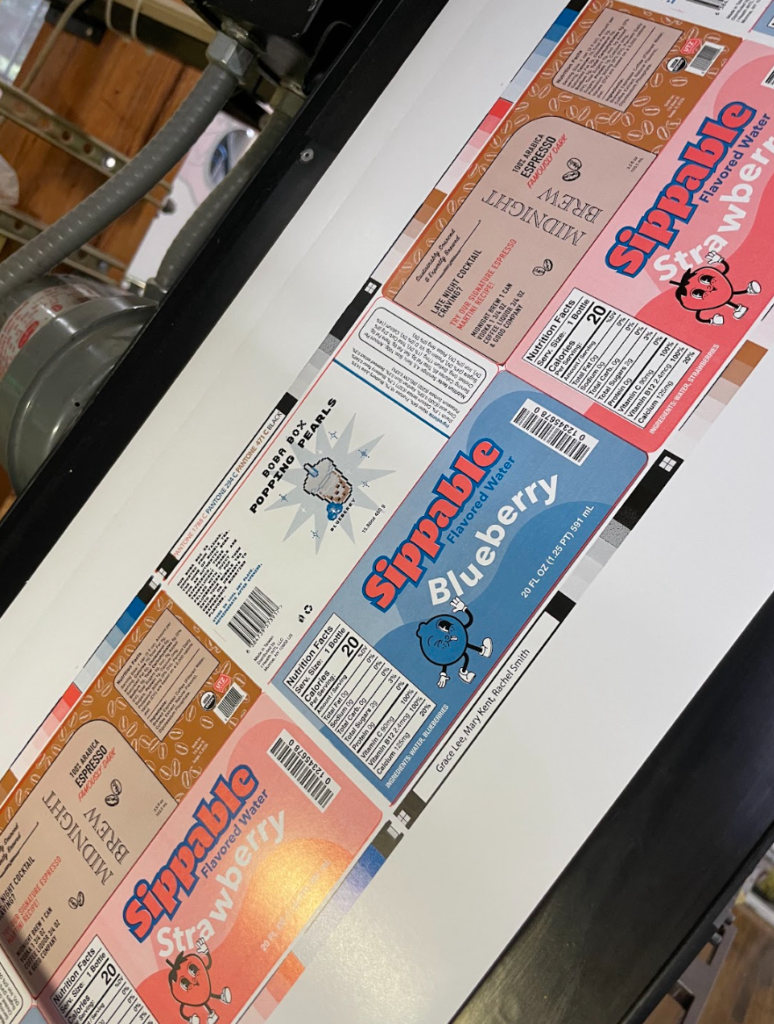
I really like how everything turned out. My group members also had very nice functional labels as well. Seeing all the parts and pieces to set up the Comco was really fun to build. Overall, the art work looked really nice. My functional label looked a lot more blue to me compared to my soft proof. If I were to change on thing, it would be the font for my logo. I learned later on there was a bold version of my font. In this label, the outer layer of my fonts point size was increased.